Baja OL Stringers glass work

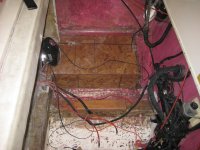
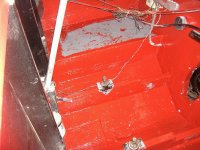
One other thing- those stringers should be set in putty before you start glassing them in. The putty bridges gaps and gives you strength. You can't have voids between themand the hull.

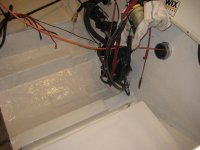
And as "waterproof" as the new material purported to be, nothing on a boat is waterproof. For insurance, they can be wrapped in a layer of cloth and resin before installation. You're pretty much just tabbing them in at that point so some work can be done outside the boat.
 
If you are getting the sunpad soaking wet all the time, you might also have to address rot issues with the wood under it at some point. Best to keep the water on the swim platform and no further into the boat if at all possible. And I agree with Chris that now is the perfect time to switch to aluminum L-angles for front motor mounts.
 
http://www.cpperformance.com/SearchResult.aspx?CategoryID=429 like these at the top of the page?

and the stringers were set with glue to span the voids. not sure if it is the best way to do it but ummm... that is how i did it.

In the middle of the page you'll see the Hardin mounts- big piece of tube with flanges on each side. These span between your stringers. You attach them with ordinary aluminum angle- typically 3/8" thickness. You put the mount on the engine, set the engine in place, engaging the tailstock, then you mount the angles to the stringers with thru-bolts. Then you position up-and-down/left-to-right to get alignment, then drill the angle. Depending on how the mount fits between the stringers, you may be able to use 3" angle, or you may have to go as large as 6".

Doing this ties the engine directly to the stringers and cuts out the flex that can cause everything from premature u-joint and gimble failures to structural cracking and even an engine ripping loose of the mounts.

As far as setting the stringers, you need a full and complet contacted bond with the bottom. If not, you'll get breakage in the non-supported areas. Tiny voids aren't going to be a problem. Large spans are. What kind of "glue" did you use?
 
While you're in there, you might want to consider ditching that pad mount and going to an offshore mount. Not very expensive or hard to do. But you'll get a ton more strength and rigidity- especially if you're moving up in power. The only trick is you'll have to align the engine to the drive gimbal with an alignment tool. No big deal though.
I also agree on the mount .
 
http://www.cpperformance.com/SearchResult.aspx?CategoryID=429 like these at the top of the page?

and the stringers were set with glue to span the voids. not sure if it is the best way to do it but ummm... that is how i did it.
Most Boat Co's that i have worked for have used a putty made from resin and cabosil to fill the voids and along the span of the stringer which will give you a good bond and provide a nice radius so your fabric can roll out creating a better lay up with less chance of air and do not forget to round the edges on top of the stringer's either by sanding or using a router which will let your fabric rollover the top nice and smooth with no chance of air or gaps because of sharp edges .
 
Most Boat Co's that i have worked for have used a putty made from resin and cabosil to fill the voids and along the span of the stringer which will give you a good bond and provide a nice radius so your fabric can roll out creating a better lay up with less chance of air and do not forget to round the edges on top of the stringer's either by sanding or using a router which will let your fabric rollover the top nice and smooth with no chance of air or gaps because of sharp edges .

good tip glad to know that. Makes sense.
 
Ok, here is a little before and after i did not submit photos of the construction due to the fact that the camera always seems to be in my woman's possession.

And before you comment.... The stringers were mad eout of marine grade wood and micro-lam which is superior to any marine grade wood (it was the sealed stuff) also you will see the foam box on the starboard. all that was inside was foam and it holds batteries on top. the box did not have any mat or resin on it just jel coat. It is not structural to the hull, it did not even tie into the floor. the port side had mat and resin on it. i think my boat was built on either a monday or friday. also the crapet went back into the bildge to cover the crap job done. so i used in that area, particle board (cruisfy me!) also it seems that they used the extra pink "lanta" paint from my stripes on the exterior to paint my bildge which is just queer to me. I did my best and learned alot from you all here. I am a dealership tech i like to make my work easier that is whey the gimbal ring and such is still in. I also used poly resin due to the price i get from a paint store for our bodyshop which is under $50.00 a gallon with hardner and no shipping. same with the gel. It was $10 a quart

I am so happy i took this job on myself. in a climate controlled garage and with nothing but time. so here goes...
 

Attachments

  • IMG_1306.jpg
    IMG_1306.jpg
    121.6 KB · Views: 25
  • IMG_1307.jpg
    IMG_1307.jpg
    140.9 KB · Views: 20
  • IMG_1310.jpg
    IMG_1310.jpg
    88 KB · Views: 20
  • IMG_1312.jpg
    IMG_1312.jpg
    53.7 KB · Views: 19
  • IMG_1313.jpg
    IMG_1313.jpg
    73.5 KB · Views: 17
if you are going to use epoxy, a large diameter shallow container will give you longer pot life than a small diameter deep container.. I.E. use some old tuperware instead o a cup....
 
and radius the top edges of the new stringers(round them off) the new glass will go around a rounded edge much better than a sharp edge, same with the bottom of the new stringer, mix some filler with some resin and fillet down the base of the stringer like caulking a windowjust a little bigger fillet.
 
if you are going to use epoxy, a large diameter shallow container will give you longer pot life than a small diameter deep container.. I.E. use some old tuperware instead o a cup....

Exactly. It's an exothermic reaction. Let it breathe. Once it gets hot, it will cure quick.
 
I am confused... I am done... does it look that bad? Those stringers are doube the width of the factory and the pink is gone. I rounded the stringers and used polyester resin like i said above. I think there may be a glitch in the site.
 
This was showing before and after gel. The major wood work was done allready and glassed in. The camera however, seems to always be with my girl. so the pics you get are my later construction photos. you would have barfed anyways with the sight of all the rotten wood.
 
Nice job, its not that hard to remove the transom assembly. Then you can seal up the hole while you have it apart. Every hole and opening is sealed on mine now. I like the way you did the drain holes, where did you come up with that idea? :sifone: Looks like you are almost ready to put the mechanicals back in. Tell your wife to get here own camera you have a project going on here!! :D
 
Nice job, its not that hard to remove the transom assembly. Then you can seal up the hole while you have it apart. Every hole and opening is sealed on mine now. I like the way you did the drain holes, where did you come up with that idea? :sifone: Looks like you are almost ready to put the mechanicals back in. Tell your wife to get here own camera you have a projecect going on here!! :D

I ground off so much silecone off the transom and also came acros a point where there was an air bubble in the mat and patched it. all was hard and dry. i dont have tabs so, i hope my chances are less to have a bad transom.

I am a tech. If i can leave it in or bungee it up i will do it. I am so grateful for the help i have got from this site and so glad i could take the time and do it myself.

And Jeff, I think i got the drain idea when i was asleep. I have the most mind activity then :sifone: I kidd, I was so happy to watch them work when i scrubbed the bildge down before gel. I was happy you gave me the idea. But mine are cooler:cheers2:
 
Nice job, its not that hard to remove the transom assembly. Then you can seal up the hole while you have it apart. Every hole and opening is sealed on mine now. I like the way you did the drain holes, where did you come up with that idea? :sifone: Looks like you are almost ready to put the mechanicals back in. Tell your wife to get here own camera you have a project going on here!! :D
i agree with jeff take thetransom assembly off its easy your rigth there now i did mine and the wood had nothing on it from baja you have 8 bolts and it comes rigth out . good luck
 

Attachments

  • Picture 058.jpg
    Picture 058.jpg
    153.6 KB · Views: 8
  • Picturevac1 025.jpg
    Picturevac1 025.jpg
    147 KB · Views: 4
Nice job, its not that hard to remove the transom assembly. Then you can seal up the hole while you have it apart. Every hole and opening is sealed on mine now. I like the way you did the drain holes, where did you come up with that idea? :sifone: Looks like you are almost ready to put the mechanicals back in. Tell your wife to get here own camera you have a project going on here!! :D
I agree. You got the motor out so remove that transom assembly and inspect the opening.
 
Back
Top